Installing CloudFunnels on your own hosting(Hosting/VPS/Server) using Cpanel
Hey guys, this is a more detailed demo on how to install cloudfunnels on your own hosting. So let's get started
Watch the Video
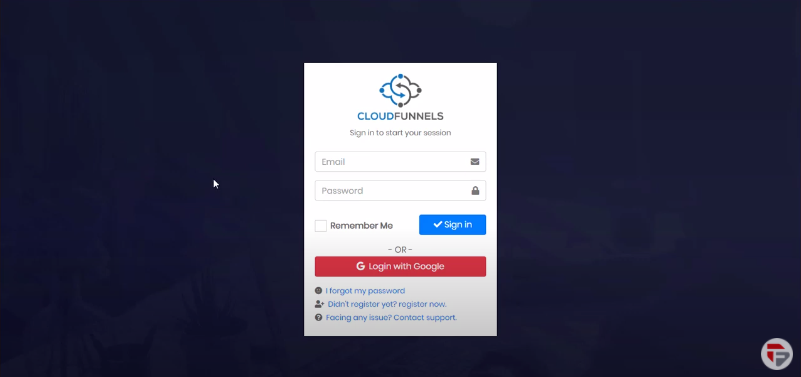
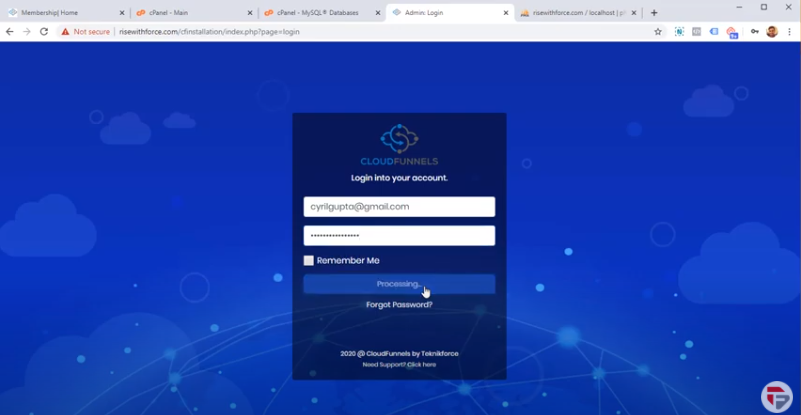
Go to cloudfunnels.in and you will be shown a login screen where you can log in. You can log in through google or fill up your email and password.
After logging in, you will be taken to the memberships. We have got multiple options here like
- Install on your own hosting
- Install on Google Cloud
- Your installations
- Generate License
- Done for you set up
- Tutorials
- Support
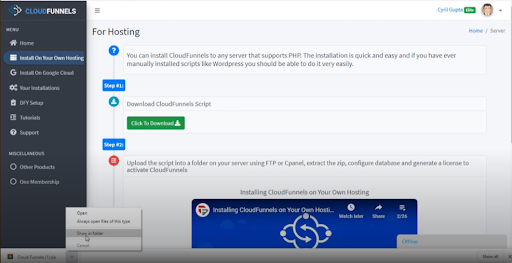
We will learn today about how to install on your own hosting. It’s very easy to just follow along.
- Click on your own hosting
- Download CloudFunnels

- Click to downloads, it will take just a few minutes to download on your Pc
- Once it is downloaded, click the arrow
- You will see an option to “show in folder
- Click on it
So here is cloudfunnels, this is the zip file that we have downloaded.

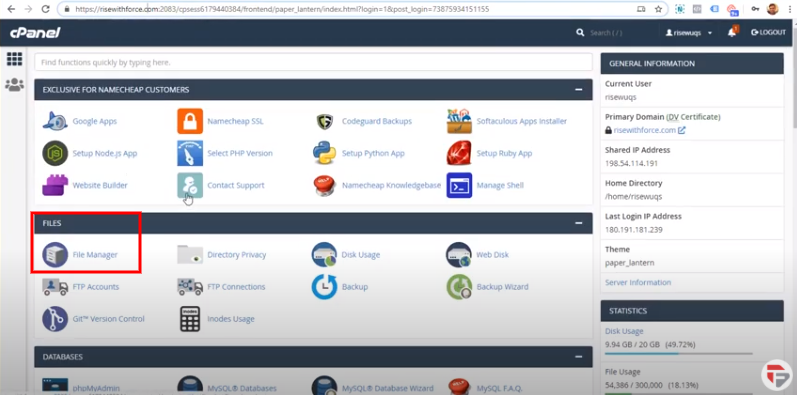
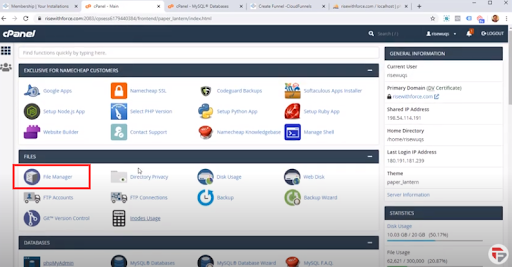
Now we will take it to the server and we will do this inside of cPanel. I am sure if you have ever done any type of hosting then you will be familiar with cPanel.
To go to cPanel, you need to type in your hosting server address/cpanel/ Put in your login details.
This is how your cPanel will look like
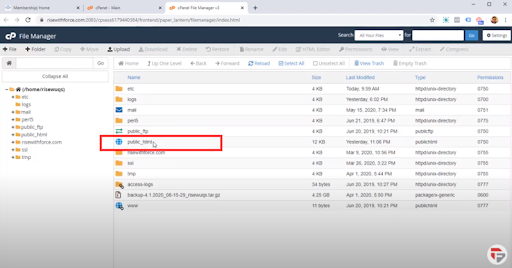
Here we can now start copying the file to our server. Scroll a little down inside Files you will see the file manager. It will show you:
- Structure of your survey
- All the folders
- All the directories on your server
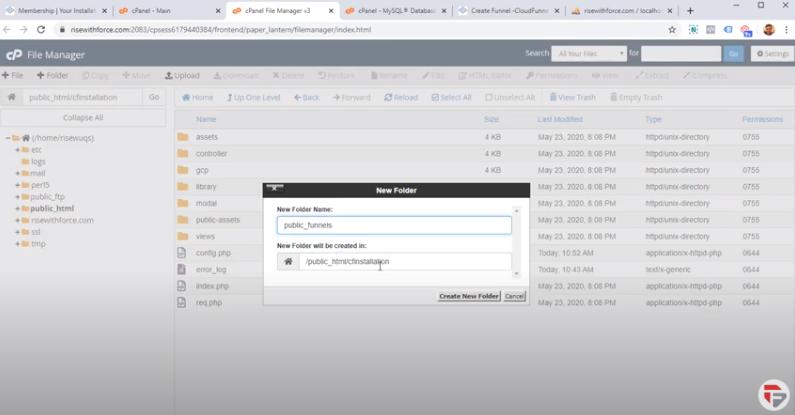
Here we have a folder named public_html. There are many more folders available but they are for different purposes.
Remember - When you are using subdomain there may not be any public_html folder, you can extract the zip in the root folder for the subdomain, if you want that subdomain (something.your-domain.com) to be the main installation URL for CloudFunnels or can create a folder(something.your-domain.com/folder) and can unzip the package there)
Now, you need to go inside public_html, if you see any place holding pages from the hosting then delete everything because I think you will want a fresh installation of cloudfunnels.
And I am sure you do want to put it in the root folder and not the subfolder. So you can delete everything and put cloudfunnels there.
This time I am gonna create a new folder called Cf installations.
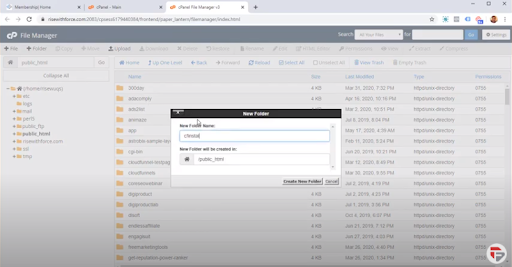
Now go inside the folder that you have created, you will see the directory is empty. This is where we will put our cloudfunnels.
Let’s click on the upload button It will show you an upload screen which supports drag and drop Go back to windows explorer and drag the zip file directly into this area
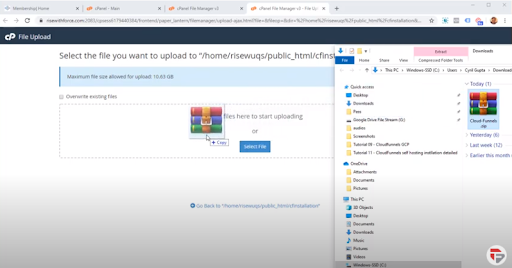
It will get uploaded within a minute. We will go back to the file manager and click reload. The file will appear right away on the file manager.
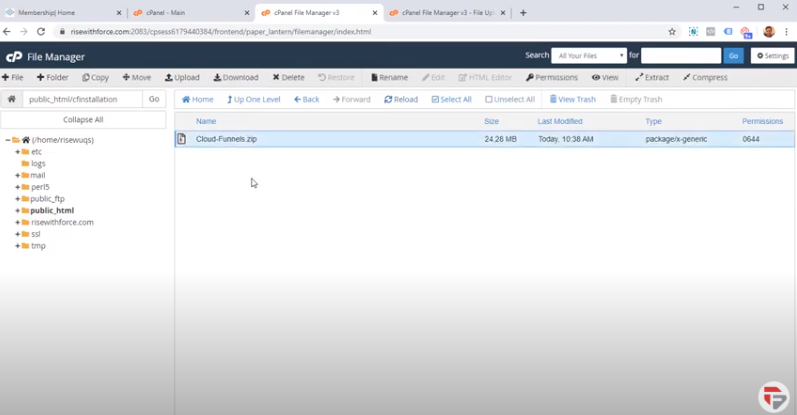
Now we need to extract this folder. Right-click on the file you will see a number of options and extract is one of them.
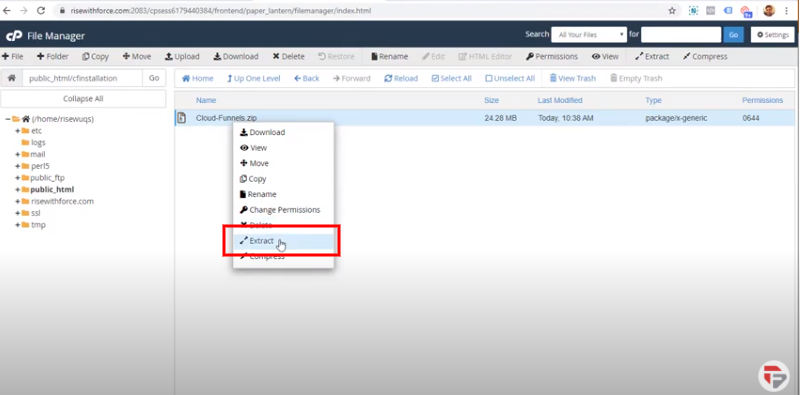
Click on the extract and it will ask you where you want to extract the file.
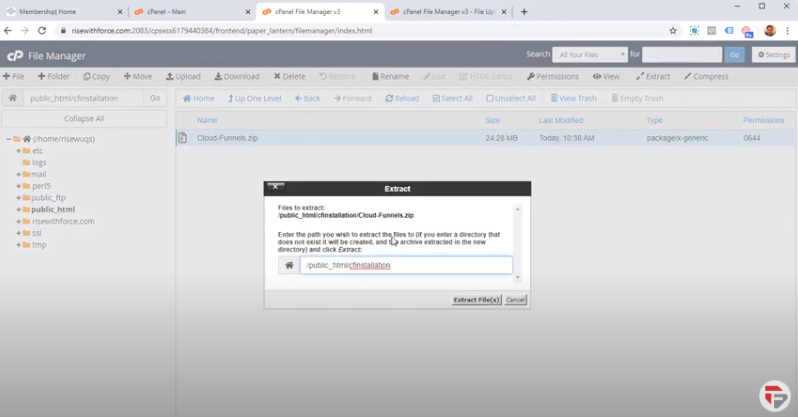
You always want to extract in the folder where you have copied everything in. We have already installed everything in Cf installations; we don’t want any more subfolders.
So we are going to put cf installations in the box. Click on extract file

In a few seconds, your cloudfunnels will be extracted. If we hit reload again you will see all the files that are required for cloudfunnels.
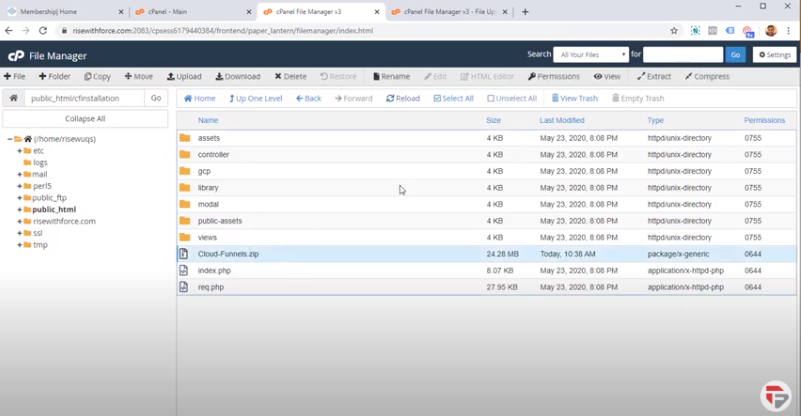
You can delete the zip file because it is not required anymore. Select it and click delete.
Connecting with the DataBase
- First, we need to go to the website URL where we have installed cloudfunnels.
(Remember everything that is inside the public_html would be root level for your domain.)
- In a new tab, I will type my domain name i.e risewithforce, and will put the file name which was inside the public_htmli.e cf installation

It will ask you to provide:
- Database Hostname
- Database User name
- Database Password
- Database Name
- Port
- Table Prefix
To provide all the above information we have to go again to cPanel.
Just like any other online CMS, WordPress, or any other system we have online, Cloudfunnels needs to connect to a database to be fully functional and this database is a My SQL database that you can create under cPanel
So when you go to cPanel, you will see an option MySQL Databases under the DATABASES.
You can do everything with PHPMyAdmin but to create a database you have to go to My SQL Databases.
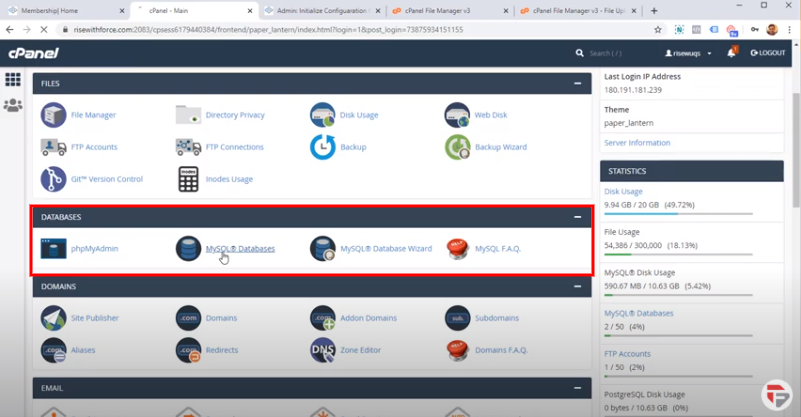
Click on My SQL Databases (Here you will see a list of all the databases that you have created )
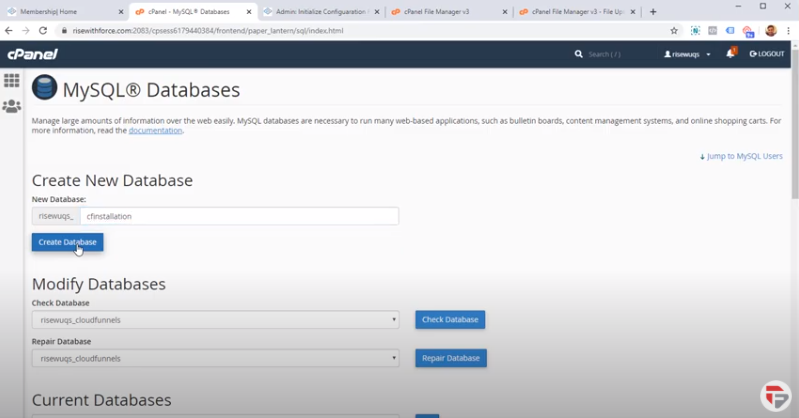
We will create a new database called Cf Installation. Click on create a database.
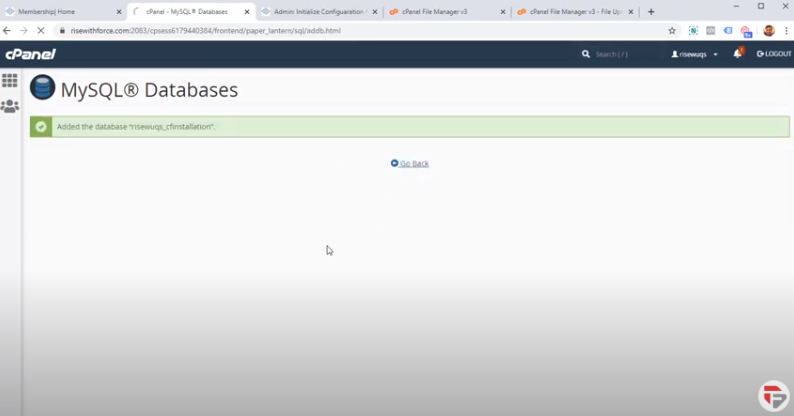
So the database is now created. You can go back to check it in the list. You are free to rename it or delete it whenever you want.
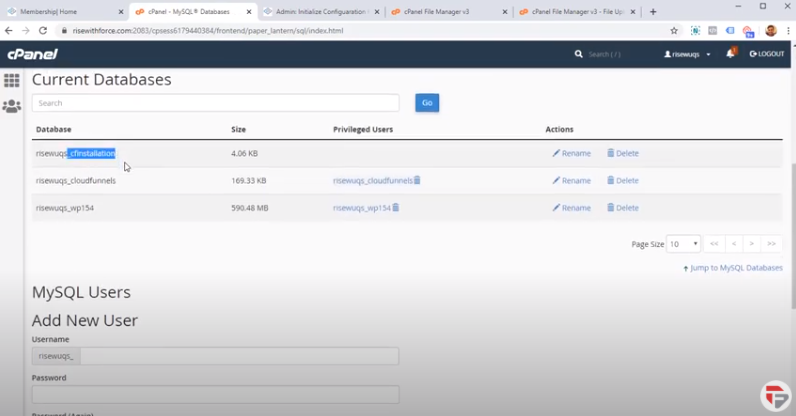
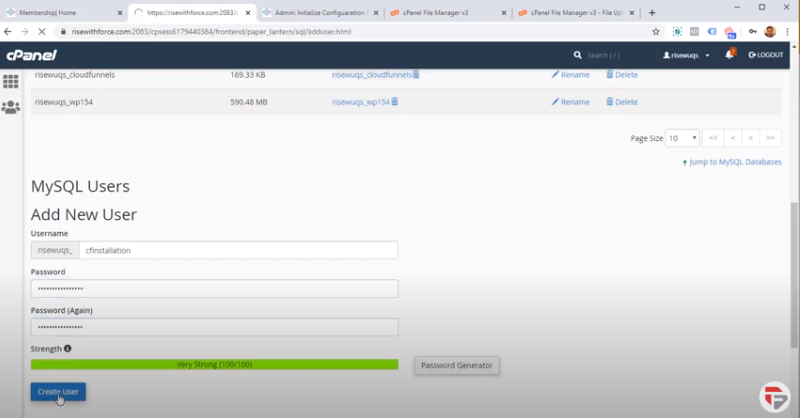
Now we need to add a user to this database. You can do that from MySQL users Add new users
I am using here the same name i.e cf installations make sure your password strength must be at least 30. Once done click create user
Next, you have to add the user to the database. Select the user and database. Then click add and the user will be added to the database.
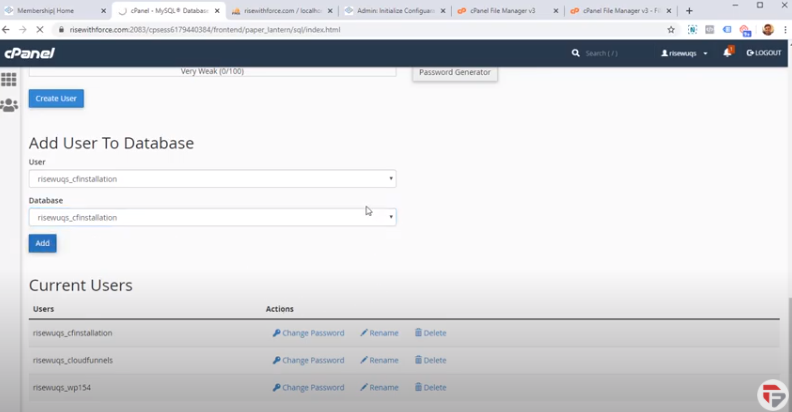
It will ask you for user privileges. Click on All the privileges
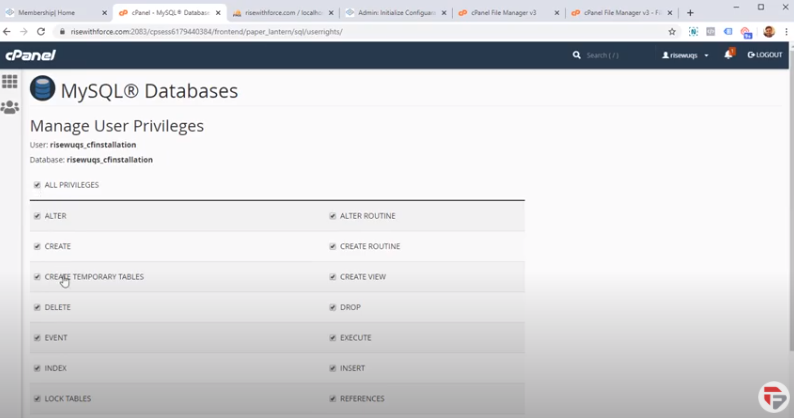
Click on make changes. You will get a success message.
Now we just need to add all this information into our CloudFunnels installations.
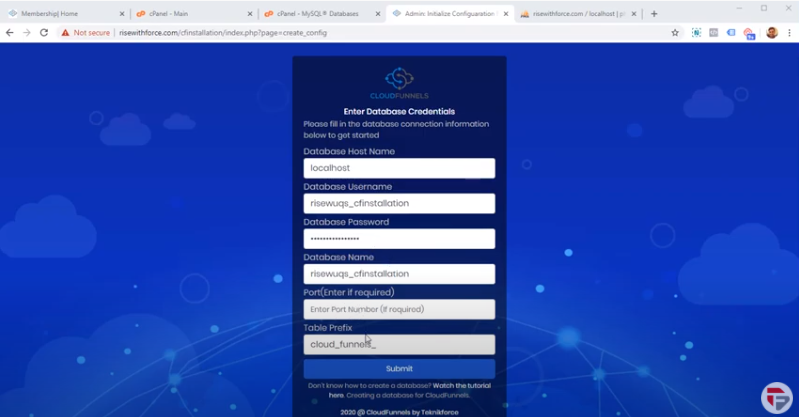
The port number is usually 3306 but you can leave it blank because it will connect to the default port by itself.
Remember the database hostname will be localhost most of the time.
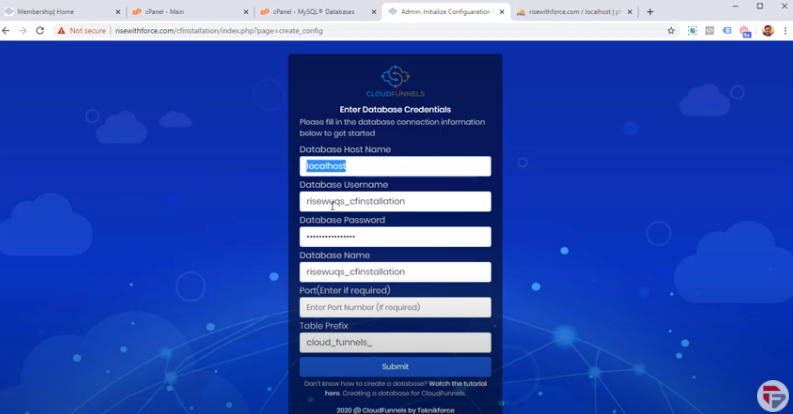
Finally, when you have put in all the information click on the submit button. After connecting it will prompt you for your own name, email address, and password.
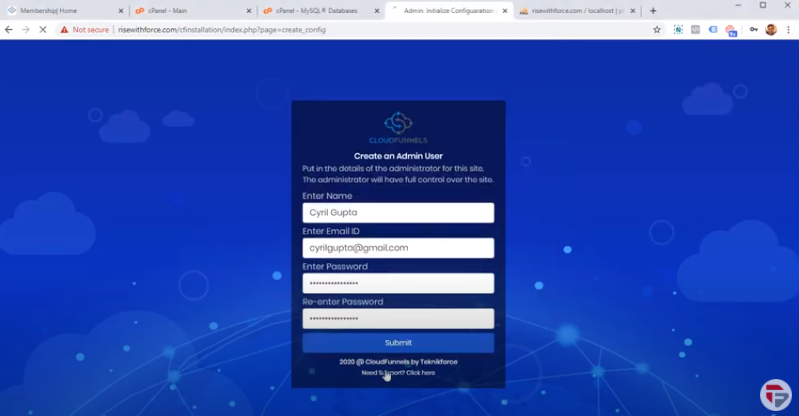
Now you can log in easily just put in your email address and password.
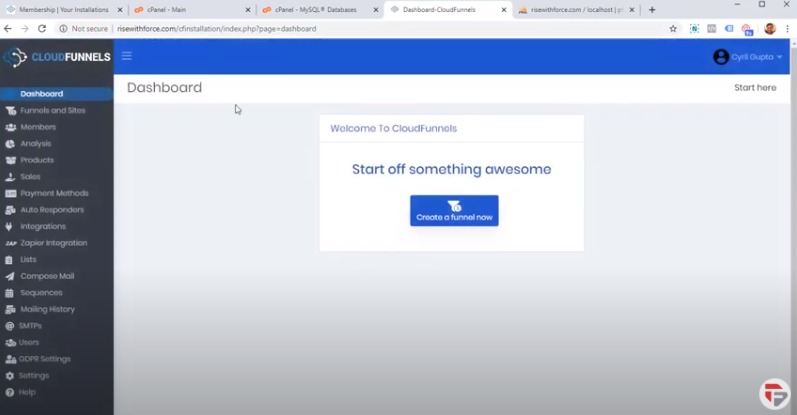
The cloudfunnels installation is done now we need to create a license.
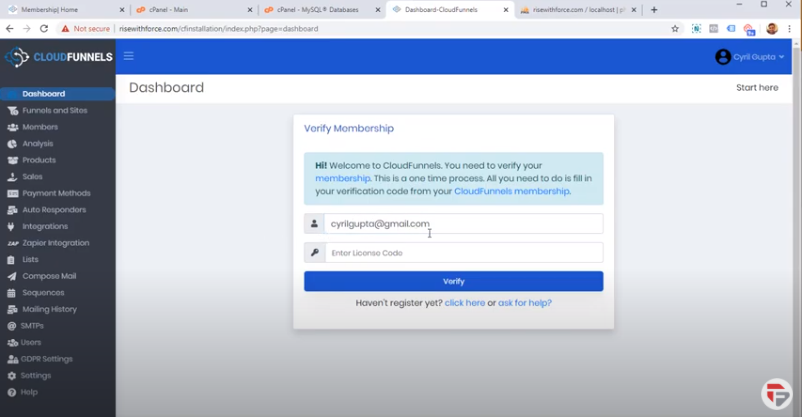
Membership email is the main email by which you have ordered cloudfunnels. Put that in the box.
To create a licensing code, you have to go back to the membership.

- Click on Your Installations
- Click Generate New license.
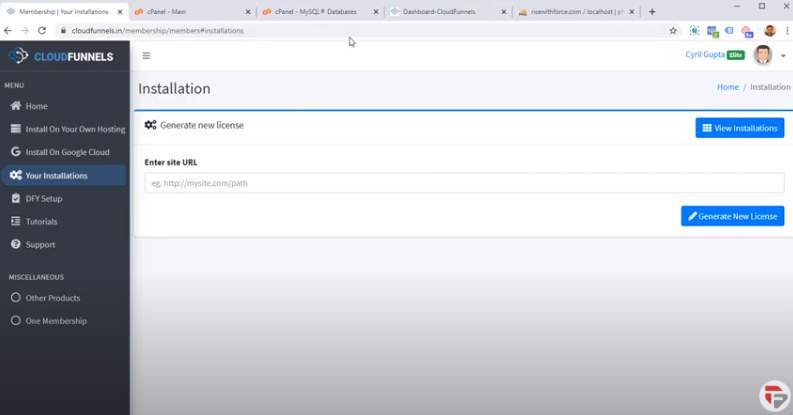
- You have to put the site URL here
- Click generate new license button

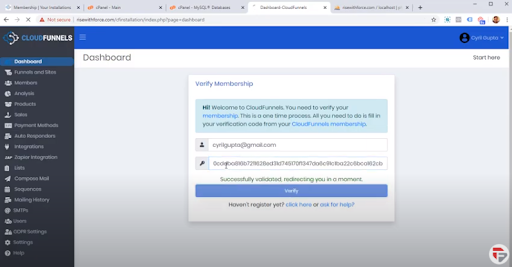
Congratulations! You have got the License
Copy it, come back to your dashboard and paste it.
Click Verify button
You are all ready to go. Cloudfunnels is ready!
One important thing to do is we need to give cloudfunnels the right permission inside the cPanel.
You can do that by following the steps
- Go to cPanel Main
- Click a file manager
- Go to public_html
- Click on cf installations
So cloud funnels need to be able to write files when you duplicate your funnels from somewhere or upload an image or upload an asset to your cloudfunnels.
It needs to write it to your server and it does that in a folder called Public Funnels and we need to create that folder manually.
Click +Folder button
Now you need to give cloudfunnels or your server the right permission by default. We can do that by right-clicking on public_funnels
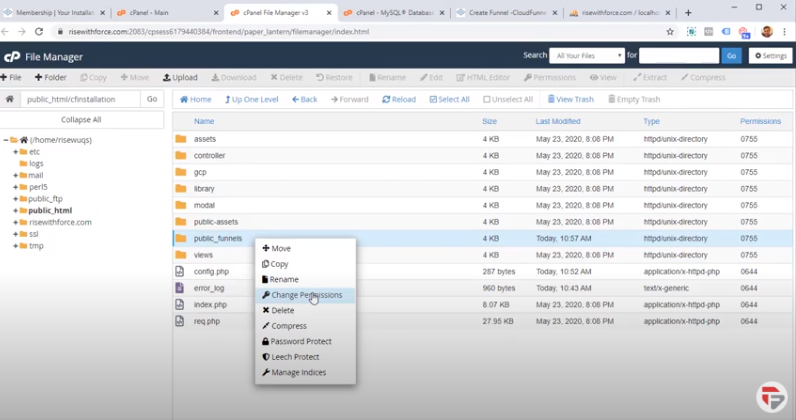
Click on change permissions. Here you have to make sure that the permission is either 755 or it is 777
You can either checkbox all of them it will make 777 or just checkbox read, write, and execute it will make 755
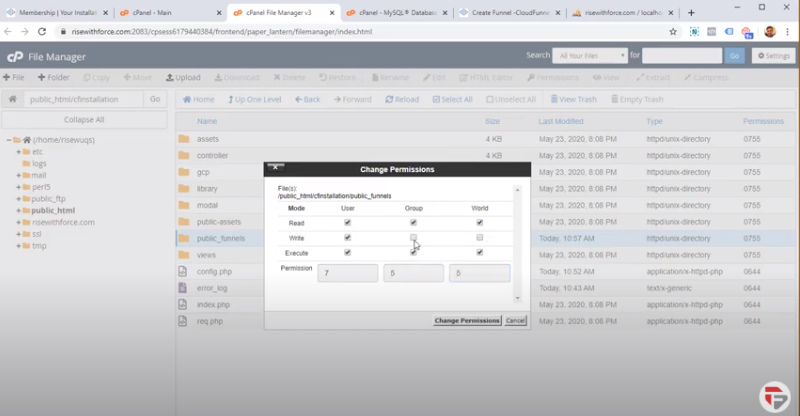
Click on change permission and that’s it your cloufunnels is ready to go.
We will now create a funnel. So I’m just gonna make a funnel - My test funnel
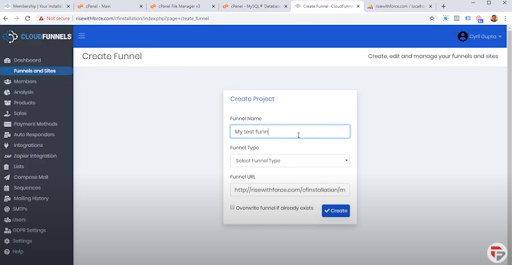
Will select the type of funnel - I’m gonna choose the basic funnel type. I want it reflected on the root, I don’t want a subfolder. That’s why I have selected Cf funnels.
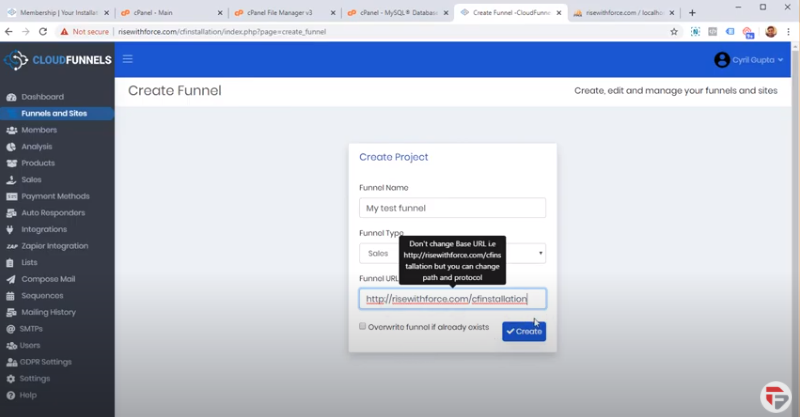
Click on create and it will be done already.
- Choose template
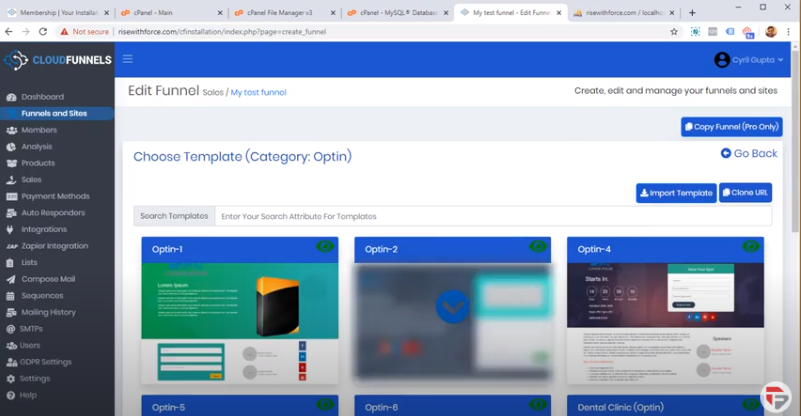
- It’s gonna duplicate over Edit Funnels
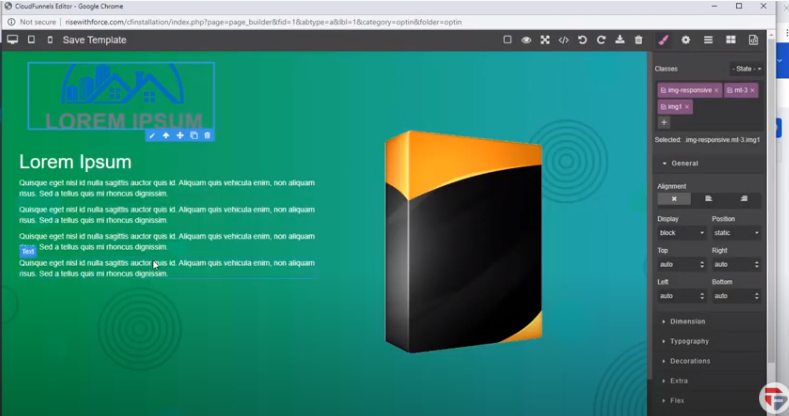
- My page is ready for editing
- You can modify any picture, text, create fresh links, and can change the box.
- It is very easy
So that’s how you install cloufunnels. I hope it was helpful and you will be able to install and use it.